

Wednesday, October 31, 2012

Tuesday, October 9, 2012
Leather Wallet from PANTS! Recyling and Upcycling
The Short Story:
Before:

After:

The Long Story: So, I bought these leather pants...
 |
| "These" leather pants |
Unfortunately, (or, fortunately) the pants were not for me to wear. The pants were for me to deconstruct and reconstruct. I was thrift store shopping with the husband on a rare afternoon where we were kid free and I came across them. They were $20 but the leather was in really good condition and obviously very high quality (not that I am a leather connoisseur... I wonder, are there such people? Are there "Leather connoisseurs"? If so, please raise your hand.)
I purchased the pants and planned to turn part of them into a purse, part into a new kindle cover, and part into a wallet. Since I am the #1 good-time fan girl of immediate gratification, I chose to do the wallet first.
 |
| Scraps used to make wallet. |
I found some scraps to coordinate, vintage buttons, small zipper and here is what I came up with:
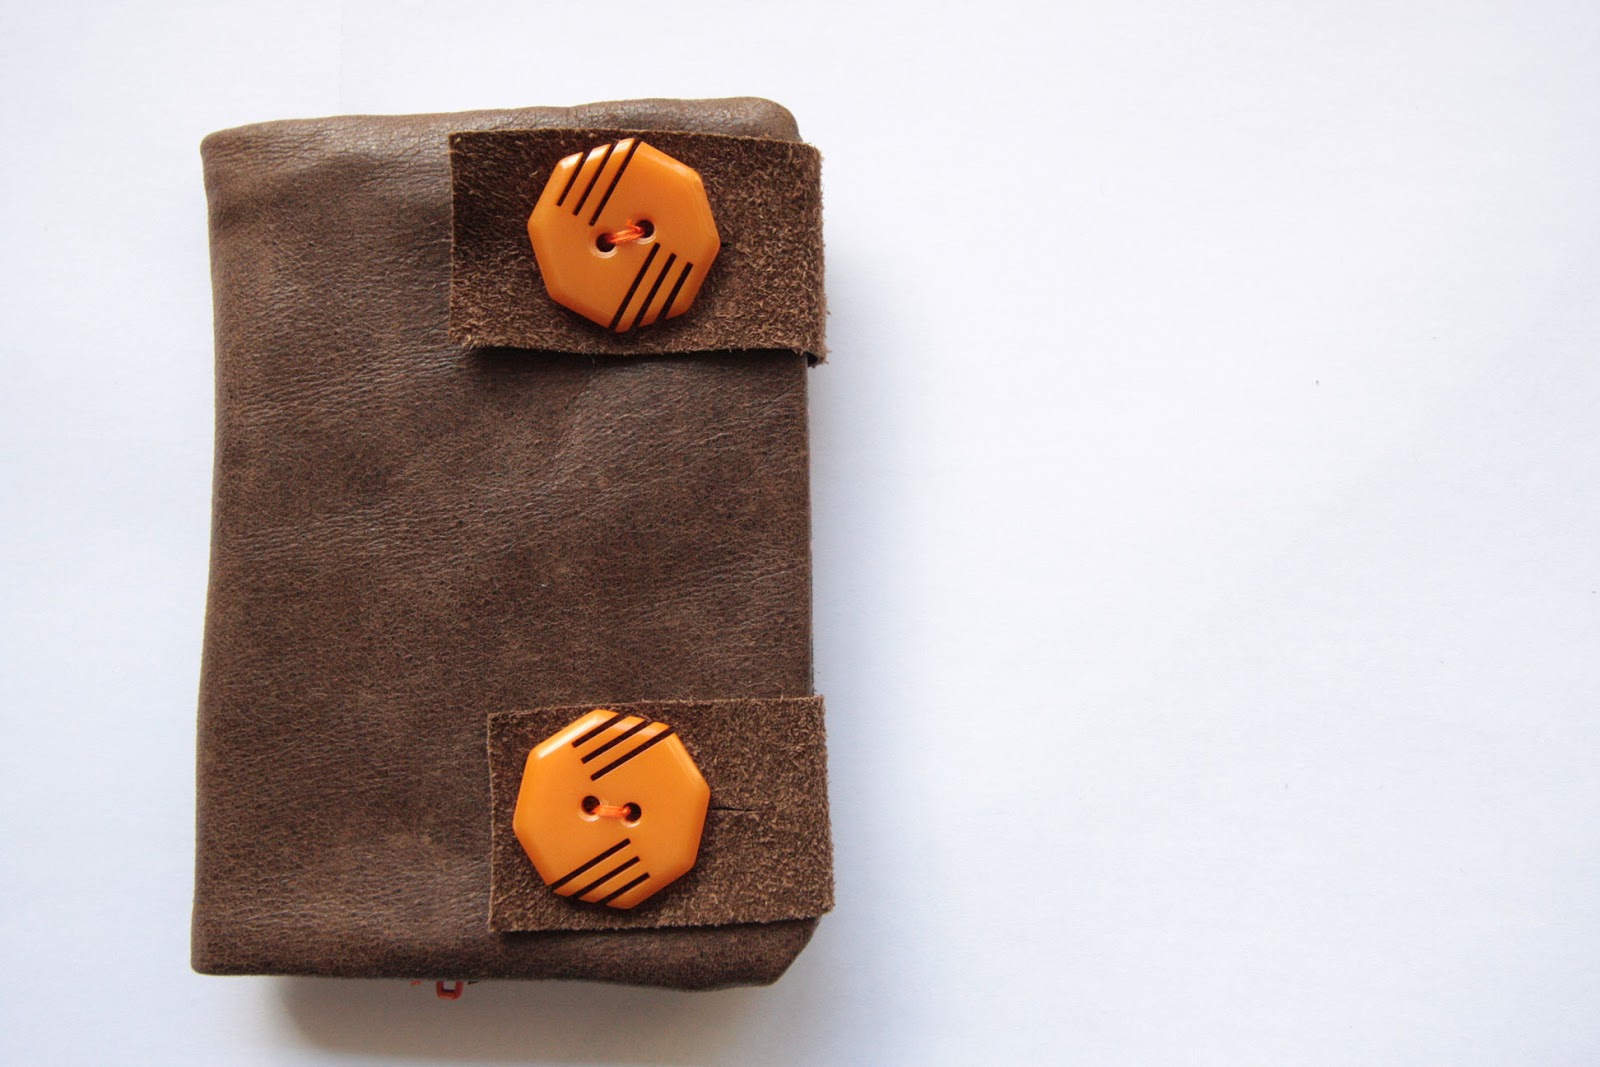

Starting Dimensions: 8.5" x 6" (open)
Final Dimensions: 7.5" x 5" (open)
Things I learned about leather:
1. You really, really, really need a non-stick foot to sew leather. I did this wallet without one and it super-sucked. I won't attempt any more leather projects without it. The issue is that the sewing machine foot pulls against the leather which makes it stretch as you sew. The leather stretches but the cloth material does not. This makes the cloth bunch/sag when the leather returns to its previous shape. I'll post an update perspective on sewing with leather when I get a chance to use the Teflon foot I ordered from Viking.
2. It is great for inlaid zippers. Since the edge of the leather doesn't fray, adding the zipper was a piece o' cake.
3. Use double sided tape instead of pins: it will stick to the leather and create just enough adhesion to keep the project together. It's not like you're going to wash your finished object in the washing machine so... who cares about washibility of the double sided tape.

Final thoughts: I love the wallet. It fits my phone, cards, and some change. Very happy with it. Looking forward to making more, this time with the Teflon foot.
If you've ever worked with leather I'd love to hear your tips/ tricks/ thoughts.
Thursday, October 4, 2012
Yarn Indecision
So, I've started a knitalong of the Staghorn Tunic with the fantastic looptange. After a great deal of deliberation I finally decided to use stash of Queensland Aran for the tunic. The yarn is a little uneven and now I am having second thoughts...

I love the pattern, I love the yarn, I just don't know if I love the yarn for this pattern...
Most of the projects completed thus far for the tunic use grey. Should I start over with grey/different yarn or should I continue with the green?
Thoughts??

I love the pattern, I love the yarn, I just don't know if I love the yarn for this pattern...
Most of the projects completed thus far for the tunic use grey. Should I start over with grey/different yarn or should I continue with the green?
Thoughts??
Monday, October 1, 2012
Kind of a random post: Doodling and Halloween
I've become rather fond of doodling. Some interesting doodle facts:
1. A group of geniuses got together and decided to charge people in order to teach them how to doodle.
2. One form of this is called Zentangle. I feel like Zentangle must have actually been created by people who- in 7th grade- were really impressive at doodling but not much else.
3. Zendangle aside, there is a theory that doodling is really good for the brain, aiding with relaxation and memory (see Andrade, Jackie (January 2010). "What does doodling do?". Applied Cognitive Psychology ).
Lately I've been doodling Halloween faces-

I don't know why but most of the faces are missing noses. I'm just not that great at noses. My plan is to make the face stamps first then doodle/carve some interchangeable bodies (torso, arms, legs). Maybe I'll finish before Halloween and use them for cards this year! ... a much more likely scenario, however, is that I spend the next 5 months carving them instead of making Christmas Cards and rediscover the stamps next year 2 days before Halloween. ;-)

1. A group of geniuses got together and decided to charge people in order to teach them how to doodle.
2. One form of this is called Zentangle. I feel like Zentangle must have actually been created by people who- in 7th grade- were really impressive at doodling but not much else.
3. Zendangle aside, there is a theory that doodling is really good for the brain, aiding with relaxation and memory (see Andrade, Jackie (January 2010). "What does doodling do?". Applied Cognitive Psychology ).
Lately I've been doodling Halloween faces-

I don't know why but most of the faces are missing noses. I'm just not that great at noses. My plan is to make the face stamps first then doodle/carve some interchangeable bodies (torso, arms, legs). Maybe I'll finish before Halloween and use them for cards this year! ... a much more likely scenario, however, is that I spend the next 5 months carving them instead of making Christmas Cards and rediscover the stamps next year 2 days before Halloween. ;-)

Saturday, September 22, 2012
I came, I saw, I pieced a kite quilt
I've made many patchwork baby blankets (or- what I call- quilt cheating). I've always wanted to actually quilt (what I think most people call "piecing") but I've never taken a class and didn't really know where to start.
Then I saw this quilt and fell in love.
So, I faked it:


I sketched out my own pattern/pieces and made the kites/diamonds much larger than the original (as I'm a fan of instant gratification and larger pieces meant less measuring, cutting, ironing, pinning and sewing...)


I'm not 100% sure that I actually did "piecing" correctly, but- if not- I'm pretty sure I faked the hell out of it.
Then I saw this quilt and fell in love.
So, I faked it:


I sketched out my own pattern/pieces and made the kites/diamonds much larger than the original (as I'm a fan of instant gratification and larger pieces meant less measuring, cutting, ironing, pinning and sewing...)


I'm not 100% sure that I actually did "piecing" correctly, but- if not- I'm pretty sure I faked the hell out of it.
Thursday, September 13, 2012
My thought for today: Do what you love.
At the risk of being a complete cliche, I have decided to write a chick lit romance novel. That's right. I'm doing that thing which will likely make me ridiculous in the eyes of everyone who doesn't actually matter. Honestly though, peeps, I can't seem to bring myself to feel to embarrassed about it because I'm having too much fun. I've added a page to this blog entitled, "Writing Projects."

Maybe I've crossed over that youthful line into adult-ville, where things like modesty and fear of being stereotyped don't really seem to matter.
I love being a mom and I love my kids. I love the work that I do. I have a great husband (and I love him). I love to knit. I love to carve stamps/blocks. I love to sew. I love red wine. I love laughing with my friends. I love to write. And, I love a good romance.
While you're doing what you love, make sure you give the two hand, two finger salute to anyone who tries to make you feel bad for who you are or what your passions are. If those people mattered, they'd support you and love you regardless and they definitely wouldn't want you to feel ridiculous.
Just, do what you love.
Own. It.
Tuesday, September 11, 2012
Stamp Carving Roundup: Part 1 Assembling Materials
If you are looking for a comprehensive resource/ post on this topic which gives you complete information, alternatives, and comparisons then go here:
http://www.nettally.com/palmk/Rubber_Stamp_Carving_Tips.html
If you are looking for a "this is what I do/what a reccommend for beginners" then this post is for you.
Part 1 will cover assembling your materials
Part 2 will cover designing your image and transfering it to your carving material
Part 3 will cover carving your design
Part 4 will cover stamping your image
1. What you need to get started
a. Pencil
b. Tracing paper
c. Carving tool
d. Carving material
e. Self healing mat
d. Paper/fabric
e. Ink
f. A piece of wood (optional)
g. Stamp adhesive (optional)

2. Where to get it/ what I reccommend/ why I reccommend it: You can buy a kit here from Amazon if you want to minimize your expenses but it doesn't contain everything I recommend. What I recommend is as follows:
a. Pencil- I prefer a graphite pencil as it will leave a darker image than a #2 when you transfer to or draw on your carving material. You can get this at any art or craft supply store; I bought this kit (Prismacolor Scholar Graphite Drawing Pencils) from Dick Blicks- once I realized the #2 wasn't ideal- in order to try out different pencils.
b. Tracing paper- you can get this at any art or craft supply store; I use this one (Strathmore 300 Series Tracing Paper Pad) and bought it at Joann's.
c. Carving tool- you can get this at any art or craft supply store; I use this one (Speedball Lino Set No. 2) and bought it from Dick Blick.
d. Carving material- I use this one (Speedball Speedy Carve Blocks) and buy it from Dick Blick.
e. Self healing mat- I use this one (Fiskars 8-Inch by 8-Inch Self Healing Rotating Cutting Mat) and bought it from Joann's
d. Paper/fabric- use whatever floats your boat! I find that, for fabric, cotton and linen work best and white or natural color fabric makes for a more vibrant image.
e. Ink- you can buy ink pads that work on paper at any craft store; I have several and prefer none. For fabric I use VersaCraft and buy it from Amazon (best price I've found although you can sometimes find it in an etsy destash sale). I like VersaCraft because it is easy to use, readily available, and heat sets quickly. There are other options out there which will give you more consistent results but- in my experience- are expensive, messy, and require several days to set. Please let me know in comments if you know of any other viable alternatives.
f. A piece of wood or acrylic block- the wood needs to be at least as large as your stamp. I have scrap wood a friend cut for me specifically for my stamping. If you aren't going to mount your stamp (and there are pros/cons to mounting) then you could use a book instead of wood.
g. Stamp adhesive- only if you are going to mount the stamp.
Again, the link I included at the beginning of this post is a great resource but- that stated- when I first started to carve stamps I felt a little overwhelmed by all the information provided on the web and felt like- as a beginner- I had too many options (types of carving materials, types of carving tools, types of transfer methods).

Next up (in October):
Part 2- Designing your image and transfering it to your carving material
http://www.nettally.com/palmk/Rubber_Stamp_Carving_Tips.html
If you are looking for a "this is what I do/what a reccommend for beginners" then this post is for you.
Part 1 will cover assembling your materials
Part 2 will cover designing your image and transfering it to your carving material
Part 3 will cover carving your design
Part 4 will cover stamping your image
1. What you need to get started
a. Pencil
b. Tracing paper
c. Carving tool
d. Carving material
e. Self healing mat
d. Paper/fabric
e. Ink
f. A piece of wood (optional)
g. Stamp adhesive (optional)

2. Where to get it/ what I reccommend/ why I reccommend it: You can buy a kit here from Amazon if you want to minimize your expenses but it doesn't contain everything I recommend. What I recommend is as follows:
a. Pencil- I prefer a graphite pencil as it will leave a darker image than a #2 when you transfer to or draw on your carving material. You can get this at any art or craft supply store; I bought this kit (Prismacolor Scholar Graphite Drawing Pencils) from Dick Blicks- once I realized the #2 wasn't ideal- in order to try out different pencils.
b. Tracing paper- you can get this at any art or craft supply store; I use this one (Strathmore 300 Series Tracing Paper Pad) and bought it at Joann's.
c. Carving tool- you can get this at any art or craft supply store; I use this one (Speedball Lino Set No. 2) and bought it from Dick Blick.
d. Carving material- I use this one (Speedball Speedy Carve Blocks) and buy it from Dick Blick.
e. Self healing mat- I use this one (Fiskars 8-Inch by 8-Inch Self Healing Rotating Cutting Mat) and bought it from Joann's
d. Paper/fabric- use whatever floats your boat! I find that, for fabric, cotton and linen work best and white or natural color fabric makes for a more vibrant image.
e. Ink- you can buy ink pads that work on paper at any craft store; I have several and prefer none. For fabric I use VersaCraft and buy it from Amazon (best price I've found although you can sometimes find it in an etsy destash sale). I like VersaCraft because it is easy to use, readily available, and heat sets quickly. There are other options out there which will give you more consistent results but- in my experience- are expensive, messy, and require several days to set. Please let me know in comments if you know of any other viable alternatives.
f. A piece of wood or acrylic block- the wood needs to be at least as large as your stamp. I have scrap wood a friend cut for me specifically for my stamping. If you aren't going to mount your stamp (and there are pros/cons to mounting) then you could use a book instead of wood.
g. Stamp adhesive- only if you are going to mount the stamp.
Again, the link I included at the beginning of this post is a great resource but- that stated- when I first started to carve stamps I felt a little overwhelmed by all the information provided on the web and felt like- as a beginner- I had too many options (types of carving materials, types of carving tools, types of transfer methods).

Next up (in October):
Part 2- Designing your image and transfering it to your carving material
Subscribe to:
Posts (Atom)