I've been wanting to make one of these for a while.
It's been a hard two months. If I haven't been sick then the husband has been sick or the kiddos have been sick. Therefore, I've done nothing creative of note. When this happens, when I'm months between projects, I start to feel a little depressed. Looking at my craft, sewing, knitting, crocheting, etc. supplies fills me with sadness and something like trepidation. It's like smelling and seeing a seven course meal when you're starving but you have no teeth.
Well, my daughter is under the weather this afternoon (this time with a stomach bug) so I decided- while she slept, instead of cleaning or folding laundry or checking my work email- that I would sew.
The cute fabric in the center is from a friend I met while at Squam last June. The plastic is from a comforter bag I saved (just for this purpose).
I used: thick plastic, fleece fusible interfacing, two large sew on snaps, white double fold bias for the top, yellow double fold bias for the sides, needle, thread.
The dimensions to cut were:
Cover, inside, interfacing: 14.75 x 10.5
Plastic: 13.75 x 10.5
I'm very happy with the finished product.
I also learned a good lesson: when frustrated due to lack of creative time/lack of creative productivity, start small; make something useful, simple, and pretty. Now my ever growing list of creative to-do items feels less daunting, no longer a chore, and something on which I am looking forward to spending time and energy.
Happy Valentines Day!!
Showing posts with label sewing. Show all posts
Thursday, February 14, 2013
Tuesday, October 9, 2012
Leather Wallet from PANTS! Recyling and Upcycling
The Short Story:
Before:
After:
The Long Story: So, I bought these leather pants...
| "These" leather pants |
Unfortunately, (or, fortunately) the pants were not for me to wear. The pants were for me to deconstruct and reconstruct. I was thrift store shopping with the husband on a rare afternoon where we were kid free and I came across them. They were $20 but the leather was in really good condition and obviously very high quality (not that I am a leather connoisseur... I wonder, are there such people? Are there "Leather connoisseurs"? If so, please raise your hand.)
I purchased the pants and planned to turn part of them into a purse, part into a new kindle cover, and part into a wallet. Since I am the #1 good-time fan girl of immediate gratification, I chose to do the wallet first.
| Scraps used to make wallet. |
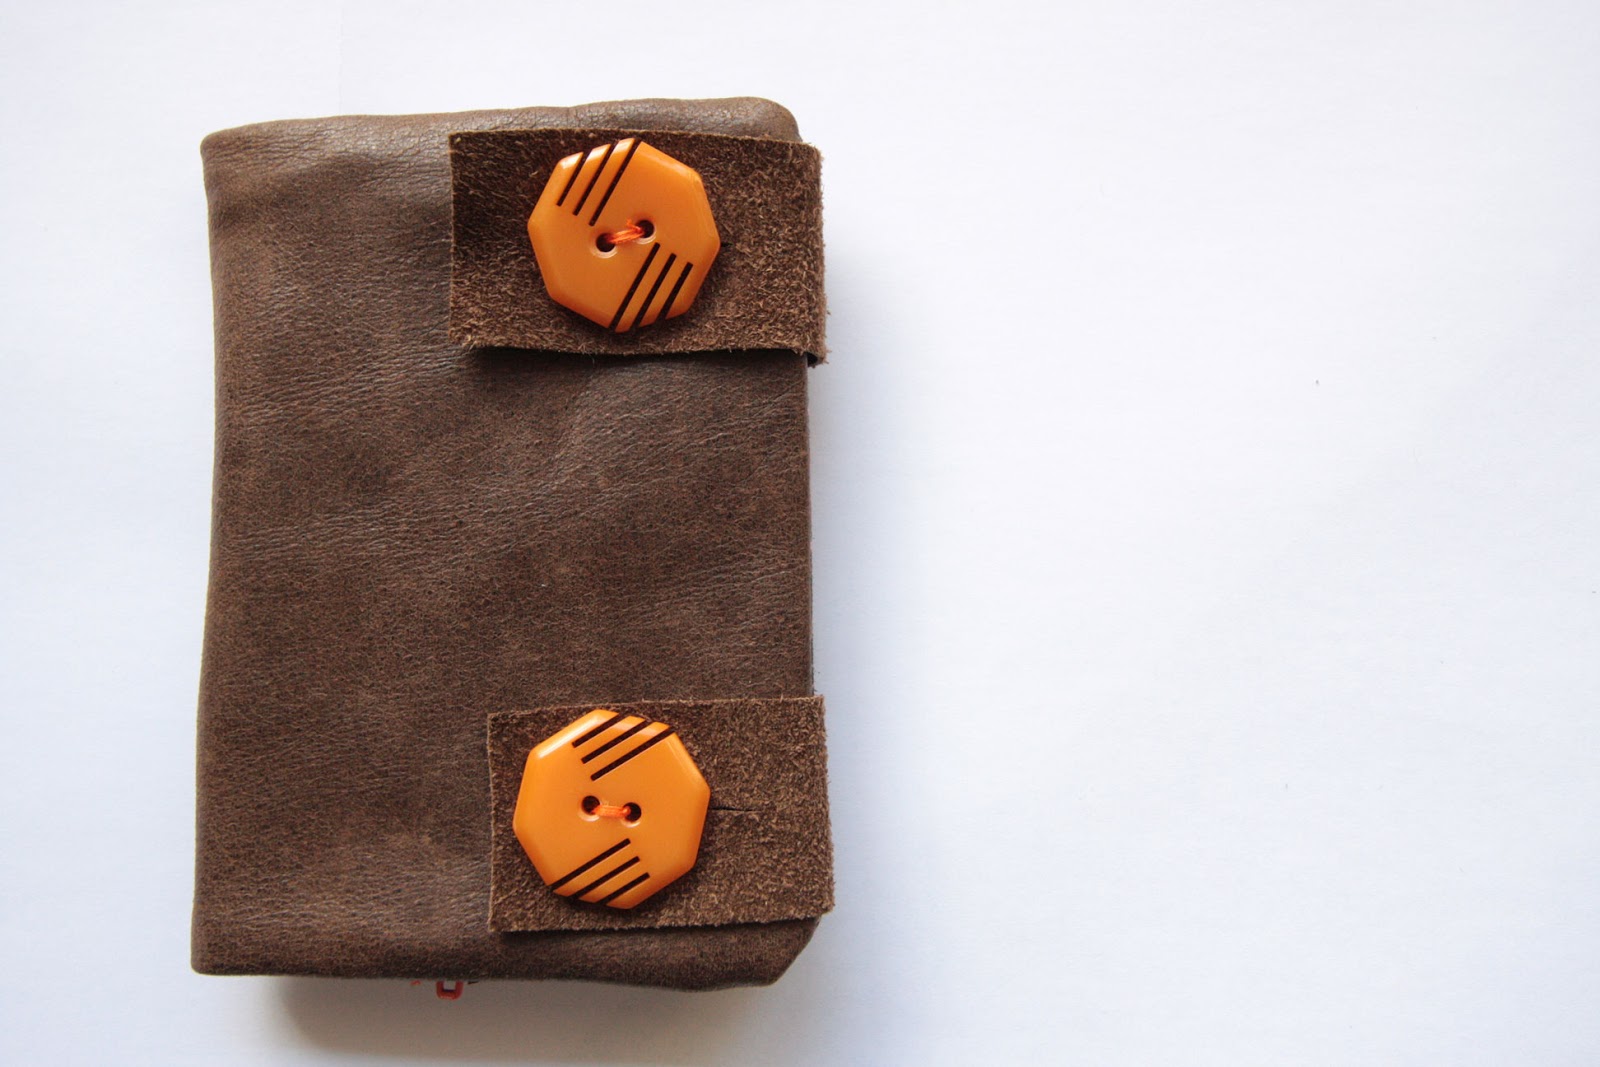
I found some scraps to coordinate, vintage buttons, small zipper and here is what I came up with:
Starting Dimensions: 8.5" x 6" (open)
Final Dimensions: 7.5" x 5" (open)
Things I learned about leather:
1. You really, really, really need a non-stick foot to sew leather. I did this wallet without one and it super-sucked. I won't attempt any more leather projects without it. The issue is that the sewing machine foot pulls against the leather which makes it stretch as you sew. The leather stretches but the cloth material does not. This makes the cloth bunch/sag when the leather returns to its previous shape. I'll post an update perspective on sewing with leather when I get a chance to use the Teflon foot I ordered from Viking.
2. It is great for inlaid zippers. Since the edge of the leather doesn't fray, adding the zipper was a piece o' cake.
3. Use double sided tape instead of pins: it will stick to the leather and create just enough adhesion to keep the project together. It's not like you're going to wash your finished object in the washing machine so... who cares about washibility of the double sided tape.
Final thoughts: I love the wallet. It fits my phone, cards, and some change. Very happy with it. Looking forward to making more, this time with the Teflon foot.
If you've ever worked with leather I'd love to hear your tips/ tricks/ thoughts.
Saturday, September 22, 2012
I came, I saw, I pieced a kite quilt
I've made many patchwork baby blankets (or- what I call- quilt cheating). I've always wanted to actually quilt (what I think most people call "piecing") but I've never taken a class and didn't really know where to start.
Then I saw this quilt and fell in love.
So, I faked it:
I sketched out my own pattern/pieces and made the kites/diamonds much larger than the original (as I'm a fan of instant gratification and larger pieces meant less measuring, cutting, ironing, pinning and sewing...)
I'm not 100% sure that I actually did "piecing" correctly, but- if not- I'm pretty sure I faked the hell out of it.
Then I saw this quilt and fell in love.
So, I faked it:
I sketched out my own pattern/pieces and made the kites/diamonds much larger than the original (as I'm a fan of instant gratification and larger pieces meant less measuring, cutting, ironing, pinning and sewing...)
I'm not 100% sure that I actually did "piecing" correctly, but- if not- I'm pretty sure I faked the hell out of it.
Friday, September 7, 2012
They're bigger on the inside...
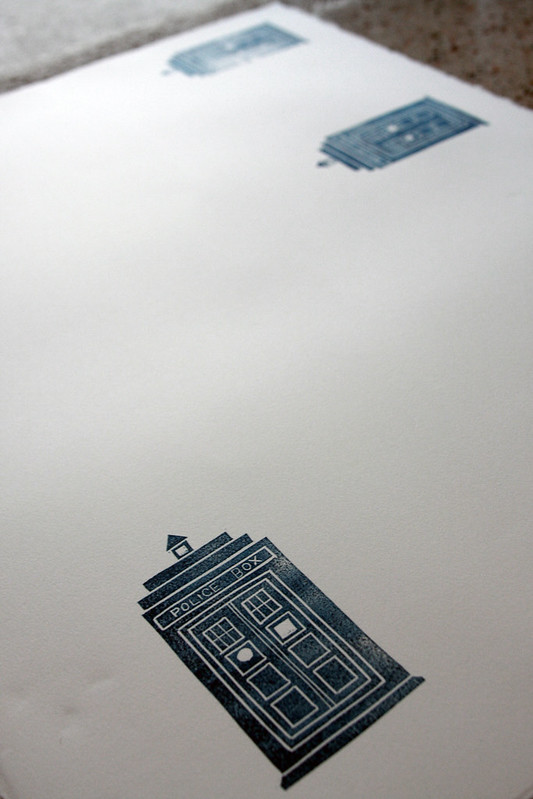
I seem to have a collection of friends who enjoy Dr. Who. I really enjoy the show although I haven't been watching recently. AnyWho, I wanted to make something Tardis related for all my Who friends (WHO also happen to all knit or crochet).
Here is the finished notions/ needle/ hook case.
The Tardis stamp was fairly straight forward. I used speedy carve and my speed ball carving set (both can be purchased online at Amazon or Dick Blicks)
I did a few test prints on cotton paper to make sure the stamp had sufficiently clean lines. The great thing about stamps (well, one of the great things) is how mufti-purpose they are. I feel completely justified in making Tardis Festivus cards this year.
I also printed the bottom blue band with 'Bigger on the Inside'. The ink I use is VersaCraft for fabric. You can pick it up on esty or on Amazon.
The only regret I have is that I only made three. Next time I need to remember to make one for myself.
Monday, September 3, 2012
Bias Shirt Smock- Tutorial
Find the tutorial here. It's in PDF.
Feel free to post any finished objects (or even WIPs) to the flickr group here
Background: When I went to SAW this last year (I feel like a lot of my posts start out this way...) I used/wore a smock during my classes; I made the smock last year and briefly blogged about it here. I have found the smock to be incredibly useful and wear it when ever I'm crafting (especially with the kids, the pockets are like having another two pairs of hands).
Anyway, the lovely ladies at SAW gave me many compliments and asked if I had a tutorial for it. I spent most of this summer promising myself I would complete a tutorial by Labor Day. So, with 28 minutes to spare, I did! Last night at 11:32pm EST I sent the finished tutorial to the lovely MB who agreed to review it for me.
The two key things in this pattern/tutorial are using bias fabric and choosing a shirt you like but which also fits easily over your chest and shoulders without too much trouble. As you can see below, the shirt I used to make the latest smock has plenty of room around my rib cage.
Also, something I don't go over in the tutorial is embellishment. I'm excited to see what people do with this simple design to make it their own.
I hope not only that you all make it but actually enjoy making
it. Please let me know if you encounter any issues; I'd like to improve my tutorial writing abilities so don't hesitate to let me know if parts are unclear/need additional info.
Happy smocking! and special thanks to Maya for her encouragement.
Feel free to post any finished objects (or even WIPs) to the flickr group here
Background: When I went to SAW this last year (I feel like a lot of my posts start out this way...) I used/wore a smock during my classes; I made the smock last year and briefly blogged about it here. I have found the smock to be incredibly useful and wear it when ever I'm crafting (especially with the kids, the pockets are like having another two pairs of hands).
![]() |
| Original smock, still in heavy use |
![]() |
| Back of the green smock, front of the purple smock. |
![]() |
| My fabulous drawing of said smock. I'm sure will be worth millions (of pesos) one day |
Thoughts on writing the tutorial: Writing my first tutorial was really difficult. I kept thinking "what would I want to know?" and tried to use that as a guide. However, I usually want to know too much too quickly. Therefore, I split it up into 3 sections: 1) overview/materials/supplies, 2) quick and dirty diagrams, 3) detail instructions.
Where possible I also tried to include both drawings and pictures of what was happening (example below, how to make a bias fabric trapezoid).
![]() |
| Hoping this doesn't look like a diagram of a football play |
![]() |
| Basically, this is a real image of the drawing above. |
![]() |
| Using a large shirt is preferable, just as long as it's not falling off... |
![]() |
| I purposefully made this smock rather plain; rickrack can be your friend. |
![]() |
| The pocket fabric is one of Anna Maria Horner's; I have a girl crush on her, it's true. |
Happy smocking! and special thanks to Maya for her encouragement.
Friday, June 15, 2012
Spring SAW 2012 Part 2: Story Scarves
Preface: If you ever have the opportunity to take a class from Maya Donenfeld then you MUST DO IT!! I don't care if she is teaching a class in proper cabinet dusting methodology or how lick mailing envelopes, you MUST DO IT. She is my hero and she is amazing. I would make her a cape but I'm almost certain- like most fashion conscious superheroes- she already has one; in her case, though, it's likely made from reclaimed FedEx containers, recycled t-shirts, and burlap.
-Overview of the Class-
Beginning: The class started with setting up power for the sewing machines and preparing our workspaces. This was a bit of an anxious exercise; however, immediately after, Maya pulled us all out into the sun and arranged us in a circle. She spoke a few calming/encouraging words then asked us all to tell each other our name, where we were from, and why we were there (at SAW). This broke the ice and allowed us (as a class) to become focused on being present in the present and tapping into our MSOP (which stands for Mojo Standard Operating Procedure, aka creative process); we soon forgot about the anxiousness associated with preparing our workspace.
Maya then had us make a 5" x 6" sachet (later filled with dried lavender which she supplied) in order to allow each of us to become familiar/comfortable with the tools we'd be using during the day (rotary cutter and mat, ruler, sewing machine, iron, etc.) Concurrently, it was at this point, as we made the sachet, that Maya asked us to really start thinking about the story we wanted to tell with our scarf; she requested that we begin the process of sifting through and eventually making a pile of those materials we wanted to include.
The simple first project was really nice for intermediate sewers as well as complete newbies; it was great to start with something small and completely manageable. I could see that everyone's confidence level increased as they made their rectangle; additionally, we all left with an awesome little lavender sachet at the end of the day.
Middle: Once the sachet was constructed, Maya had us turn back to the materials we'd brought for our scarves; hopefully, by this point, most people had assembled a meaningful pile. We were then allowed to work at our own pace and MSOP.
Throughout this time Maya would stop and check in with each person; she wanted to know our direction, what story we wanted to tell, and was key in helping us cull and focus our narrative.
She also, at opportune intervals, provided quick and effective tutorials to those who wanted to add a ruffle or gather or other design element to their scarf. This was great because, even though we were immersed in our projects, we still learned new skills and techniques.
I want to note that Maya brought a ton of linen garments and scraps for us to use. This was very generous and helpful; I used an old linen skirt (provided by Maya) for the back of my scarf and likely would not have finished had she not brought the extra materials.
End: Toward the end of the class Maya gathered us together and demonstrated how to design and create a stamp from eraser material. She wanted each of us to carve a simple symbol, meaningful to us, which we could then use to sign our finished piece.
I believe the other reason for the stamp was to show us that we could take reclaimed materials (old linen skirts, drapes, etc.) and make them new by generating printed fabric of our own design.
Once we carved our design we stamped it on our scarf and sachet.
Wrap up: At the end of the day we assembled our projects and sat on the stairs of the playhouse for a group picture. If time had permitted, it would have been great to dedicate some time to gathering the group together to speak about each of the objects and learn the story behind everyone's scarves. I believe Maya wanted to give everyone as much time as possible to finish their scarf and, therefore, we didn't have the luxury of a group wrap up.
My MSOP: The scarf represents any given week in my life: I'm a working mom; I feel like I work all the time. The business shirts are my days (and sometimes my nights). My kids are in my heart every moment (represented by the robot patch on the pocket, where the heart is). The brief scraps of color represent the time I am able to piece together for creativity.
The scarf is made from my husband's old business shirts, strips/scraps of my favorite fabric, and a small patch of fabric which I designed for my kids (the robot over the pocket) using spoonflower.
At first I wasn't sure what I wanted to do with my scarf or what story I wanted to tell. But, Maya has this uncanny ability to sense when someone needs help and guidance. She asked the right questions at the right time which allowed me to find my "fiber voice." After just one very brief conversation with Maya the story I wanted to tell clarified and I was able to set my own pace.
Thank you, Maya, for everything! You are beautiful and inspiring.
Friday, February 3, 2012
r2d2 Quilt... humble beginnings
The boy has outgrown his current blanket and needs a new comforter. I want(ed) to make him something that- as he grows into the nerd-child he is destined to be (based on his parentage)- he will feel good about for years to come.
Yesterday he and I drew a giant bust of r2d2.
I've already decided that my quilting skills (or lack thereof) are not conducive to actual piecing so I'm going to applique the entire thing.I ironed heavy weight fusible interfacing to some grey fabric and cut out the basic shape.This week I'm going to iron fusible interfacing to the rest of the colors and cut out the remainder of the shapes.I'm toying with the idea of making background color either solid gray or orange and yellow (yellow is his favorite color) for the planet and sky of Tatooine... and I haven't decided if I'm going to incorporate the multiple moons...
Friday, May 13, 2011
Quilt Tops
About a week ago I finished the 3 blankets and now I have 4 quilt tops left (just in case...) Assembly style was great for multiple small blankets. However, after making all these, my son wants a blanket of his own.
How can it be that I've never made him one?
Sunday, April 17, 2011
Piper's blanket
Friday, November 19, 2010
Faking it for Lily
I'm self taught.
By "self taught" I mean I have no one teacher but rather I read multiple sources OR I look at a picture and try to figure it out (faking it). I've been faking quilts for a while now and my lovely sister just had a lovely baby so I'm going to fake her a quilt.

These little dolls will be sewn on white patchwork squares; I will "fake" embroider. Since I'm perpetually low on time, I hope to finish the quilt by her 12th birthday.
By "self taught" I mean I have no one teacher but rather I read multiple sources OR I look at a picture and try to figure it out (faking it). I've been faking quilts for a while now and my lovely sister just had a lovely baby so I'm going to fake her a quilt.
These little dolls will be sewn on white patchwork squares; I will "fake" embroider. Since I'm perpetually low on time, I hope to finish the quilt by her 12th birthday.
Subscribe to:
Posts (Atom)